Pages

.

Showing posts with label cookies and bars. Show all posts

Pumpkin and Cranberry Dessert Pizza

I've been playing in the kitchen today and this is the result, Pumpkin and Cranberry Dessert Pizza.  I made this Patriotic Dessert Pizza last summer and was kind of craving it.  But, I thought it would be fun to make a dessert pizza with some fall flavors.

I decided to combine the flavors of pumpkin pie and cranberry sauce.  Where did I get this crazy idea?  My mom likes to put cranberry sauce on her slice of pumpkin pie.  Honestly, I thought that was kind of weird when I was a kid.  But, many years ago on Thanksgiving, I finally tried some cranberry sauce on my slice of pumpkin pie and I liked it!  I liked the sweet, tanginess of the cranberry sauce mixed with the rich, creamy pumpkin filling along with a big dollop of whipped cream. Yum! 

Ingredients (printable recipe)
Crust:
1 cup flour
1/4 cup powdered sugar
1/2 cup butter, softened to room temp
Filling:
8 oz. cream cheese, softened 1/2 cup canned pure pumpkin puree 1 1/2 tsp. pumpkin pie spice 1 tsp. vanilla 3 Tablespoons brown sugar (Dark is best!) Dash of salt
Topping: 
1/4 cup orange juice
2 teaspoons cornstarch
1 (16 ounce) can whole berry cranberry sauce
Whipped cream, if desired
Pecans, roasted and coarsely chopped, if desired
Directions
Crust:
In a medium bowl, combine flour, sugar and butter. Form into a ball with hands and press into a 14-inch ungreased pizza pan OR roll out the crust on a pizza stone . Use flour as needed to keep crust from sticking to rolling pin.
Bake at 325 degrees F. for 15 minutes. Let cool completely.

Topping:Whisk orange juice and cornstarch together until smooth in a small saucepan. Stir in cranberry sauce. Bring the mixture to a boil over medium heat, stirring all the while. Let the filling boil about 1 minute, then remove from heat and let cool about 10 minutes. Chill in fridge. When chilled, it's ready to spread on pizza.
Filling:
Combine cream cheese, pumpkin puree, pumpkin pie spice, vanilla, brown sugar and salt in a large bowl. Using an electric mixer, blend until smooth and creamy.

Spread the pumpkin pie cream cheese filling on top of cooled crust. Then, spread the chilled cranberry topping on top of the pumpkin cream cheese (I saved a few Tablespoons to garnish my dessert plates). Slice and garnish with whipped cream and chopped pecans, if desired. Store any extra pizza in the refrigerator.

*Notes:  I think this dessert pizza tastes best after it's been chilled in the refrigerator for a few hours.

Inspired by these recipes: 
Creamy Pumpkin Pie with Cranberry Topping from Spoonful---originally from Family Fun Magazine (I used the cranberry topping recipe)
Strawberry Pizza from You Homebased Mom (I used the crust recipe)
Pumpkin Pie Cream Cheese from My Biscuits are Burning
  
I made the cranberry topping first and let it chill in the fridge while I worked on the rest of this dessert.
All you need is a pair of hands to mix together the crust. So simple! I just needed a little extra flour to keep the dough from sticking to the rolling pin when I rolled it out onto the pizza stone.
When the crust is cooked, it looks like a giant sugar cookie. But, it isn't super sweet like a sugar cookie. It is more buttery and flaky with a hint of sweetness.
The pumpkin pie cream cheese. This stuff is great on bagels, too!
First, spread on the pumpkin pie cream cheese.
Then, spread the cranberry topping on top of the pumpkin pie cream cheese. I used all but a few Tablespoons of cranberry topping that I saved to garnish the dessert plates---and then, forgot to use it!
Garnish the slices with some whipped cream and chopped pecans, if you like.
You can see that the cranberry topping is a little runny. It sets up more when you let this pizza chill in the refrigerator. I cut this piece right after I made it.
The Results... 
Pumpkin and Cranberry Dessert Pizza did combine the delicious flavors of sweet, tangy cranberry sauce and rich, creamy pumpkin pie filling on top of a buttery, flaky crust.  The kids liked this dessert just as much as I did!  They gave it 4 1/2 stars (out of 5).  It definitely tastes best after it has a few hours to chill in the refrigerator.  The kids liked it with whipped cream, but not with pecans on top.  Playing in the kitchen paid off today!


I share recipes at these link parties.
reade more... Résuméabuiyad

1-2-3 Bars

Cookie exchanges, bake sales, potlucks, classroom treats, picnics, birthdays.......I've made 1-2-3 Bars for all of these reasons and more!  These bars are delicious, no-bake and easy as 1-2-3!

This is a tried and true family favorite recipe.  I have made these bars so many times over the years that I have this recipe memorized.  I don't even have to pull it out anymore.  I have been asked for this recipe many times, too.  I made these bars for my oldest daughter to share at school for her birthday and her teacher sent a note home asking for this recipe.  I've made and given these bars away as neighbor gifts and I've had my neighbors ask me for this recipe.  I've made these bars for potlucks and picnics and have given this recipe to many friends.  You know you have a great recipe when others take the time to ask for it!

I was first introduced to these yummy treats by my husband's family.  My husband and I met in college and after dating for a whole 3 1/2 months, we got engaged!  I flew to his family's home over Christmas break to meet everyone.  From this visit I found out that my husband came from a wonderful family and  also that my mother-in-law (to be) was a wonderful cook!  She has shared lots of delicious recipes with me over the years, including this one for 1-2-3 Bars. 

Ingredients (printable recipe)
1 cup light corn syrup
1 cup granulated sugar
1 cup creamy peanut butter
6 cups Special K cereal
1 cup chocolate chips
1 cup butterscotch chips
Directions
1. In a large bowl measure out Special K cereal, set aside. Mix corn syrup and sugar together in saucepan. Heat mixture until sugar is melted and no crystals remain. (I like to bring it just barely to a boil). 

2. Remove saucepan from heat and stir peanut butter into sugar mixture until smooth. Pour mixture over cereal and mix well until cereal is well coated. Pour into a buttered 9x13 inch pan. Press mixture evenly in pan (I use my hands--butter them first to keep it from sticking).

3. Mix together chocolate chips and butterscotch chips. Melt slowly in a double boiler or microwave safe bowl stirring until well blended and creamy. If using microwave, be sure to use 1/2 power setting and stir every 30 seconds AFTER first 2 minutes of heating. Be careful not to overheat. Spread melted chips over top of cereal mixture. Cool. Cut into bars when chocolate topping is set. 

It's as easy as 1-2-3!

Source: mother in law

Pouring the sugar/peanut butter mixture onto the Special K cereal.
Spreading the melted chocolate and butterscotch chips on top.
For a bake sale, I decorated the bars with candy. Push the candy into the chocolate layer right after you spread it (before it sets up).
The Results...
A chewy, sweet, peanutty bottom layer with a smooth chocolate and butterscotch flavored top.  If you love the combination of chocolate and peanut butter, then you're gonna love 1-2-3 bars!  I like the extra flavor the butterscotch chips add to the chocolate layer on top.  There's a reason these have been a family favorite for so many years.  Actually there are two reasons, 1-2-3 Bars are so easy and so delicious!

 I share recipes at these link parties.

reade more... Résuméabuiyad

Fresh Peaches and Cream Cookies

I hope you are enjoying summer!  Summer is always too short for me.  Around this time I find myself hoping summer wasn't coming to an end so soon.  The kiddos and I have been thinking of what fun things we can still fit in during these last few weeks until school starts.  Here are a few things on our "to-do list": another zoo trip, another day at the pool, more fishing and a family camping trip.

Fresh fruits and veggies are a wonderful part of summer.  Right now we have fresh peaches everywhere!  Last summer I found our favorite recipe for peach cobbler, Easy Peach Cobbler.  This year I found this recipe for Fresh Peaches and Cream Cookies.

I thought this recipe would be perfect for the Behind the Curtain Dessert Challenge this month.  Head over to The Lady Behind the Curtain to learn more about this challenge.  Basically, we are assigned two ingredients and the challenge is to make a delicious dessert with them.  This month the assignment is Peaches and Cream, yum!

Ingredients (printable recipe)
2 1/4 cups all-purpose flour
3/4 tsp. baking soda
1/2 tsp. salt
1/2 tsp. cinnamon
1 cup unsalted butter, softened
1/2 cup white sugar
1/2 cup brown sugar, firmly packed
1 egg
1 tsp. vanilla extract
1 1/2 cups fresh, diced peaches (skin removed)
1/2 cup white chocolate chips
Glaze:
1/2 cup powdered sugar
1-2 Tbsp cream (or enough to make a drizzle consistency)
1/4 tsp vanilla extract
Directions
1.Preheat oven to 350 degrees F. Grease or line cookie sheets with parchment paper. In a large bowl, combine flour, baking soda, salt and cinnamon. Stir together and set aside.
2. Using a sharp knife, remove the skin from peaches and cut into small chunks. Place the diced peaches on a paper towel and set aside.
3. In another large bowl, cream together butter and sugars until light and fluffy, about 3 minutes. Add egg and vanilla. Beat until combined. Add flour mixture and beat on low speed until well incorporated. Gently fold in peaches and white chocolate chips.
4. Use a cookie scoop or tablespoon to drop dough in rounded spoonfuls onto the cookie sheets. Leave plenty of room between cookies to allow for some spreading. Bake about 10-12 minutes until light golden brown. Cool 1 minute on cookie sheet, then transfer to wire racks to cool completely.
5. Mix together the powdered sugar, cream and vanilla until smooth. Drizzle lightly over cookies while still warm. Allow to cool. Enjoy!

Notes: Stir in the peaches and white chocolate chips well. It says 'gently fold', but it is difficult to be gentle with a stiff cookie dough. Do the best you can.

Adapted from Sprinkled with Flour

Fresh, diced peaches!
Here is the cookie dough.
I didn't see how I could 'gently fold' the peaches and chips into this stiff cookie dough. I wasn't very gentle, but I did try to be careful not to break up the peaches too much.
The recipe didn't say whether to grease or line the cookie sheets. So, I put some cookies straight on the sheet to see if they would stick. They did kinda stick, so I recommend dropping the cookie dough onto a greased or parchment lined cookie sheet.
These sweet little cookies are pretty irresistible!
You can see the cake-like texture and the yummy bits of fresh peaches and white chocolate, yum!
The Results...
Fresh Peaches and Cream Cookies were cake-like in texture and had a hint of cinnamon which tasted wonderful with the fresh, diced peaches and white chocolate chips.  

I had cookies and milk waiting for my husband when he came home from work---what a lucky guy! :)  He liked these cookies and thought this was an interesting way to use peaches.  Peaches and Cream Cookies are slightly different from the usual cookies we make. We prefer a more dense, chewy cookie, but we still liked these cake-like peach cookies.  Cookies never last long around here and these cute, little, peach cookies soon disappeared!   
 

I share recipes at these linky parties.
I'm looking forward to checking out all the Peaches and Cream Desserts from this challenge! You can find them at the end of this post.
Lady Behind the Curtain Dessert Challenge
reade more... Résuméabuiyad

S'mores Brownies

I've mentioned before that I like to keep some store bought brownie mixes around to make a quick dessert.  I like finding ways to make them a little more special, not just plain brownies.  These Peanut Butter Frosted Brownies are already one of our favorite ways to kick-up a brownie mix.  I recently found another way to kick-up a brownie mix, S'mores Brownies! 

Ingredients (printable recipe)
About 16 whole graham cracker sheets (enough to cover a 15x11x1 baking sheet)
2 brownie mixes---plus eggs, oil and water per instructions (each mix makes a 9x13 pan)
3 cups miniature marshmallows (*I used a bag of large marshmallows)
1 1/2 cups milk chocolate chips
Directions
1. Place graham crackers on greased (I used cooking spray) 15x11x1 baking sheet.
2. Prepare brownie mixes as instructed on box. Spread over crackers.
3. Bake at 350 degrees F. for 25-30 minutes.
4. Sprinkle with marshmallows and chocolate chips.
5. Bake 5 minutes longer. Let cool.

Adapted from Food.com

Notes: Dip your knife in hot water and wipe with a cloth or paper towel while cutting these brownies. The marshmallows stick to the knife, so I had to wipe it a few times while cutting.

*I would stick to the miniature marshmallows instead of the large ones. The mini marshmallows mix with the chocolate chips better and spread out more evenly on top of the brownies.

Super easy bottom layer
Spread the brownie batter right on top.
The extra goodies go on top for the last 5 minutes.
Ooey, Gooey, Goodness!
The Results...
S'mores Brownies would be perfect for a summer potluck or anytime you invite some friends over.  This recipe makes a BIG pan, so it's a good idea to share. :)

Our family really liked these brownies, but I wish I had used miniature marshmallows instead of large marshmallows.  I think the miniature marshmallows would have mixed more evenly over the top of the brownies with the chocolate chips.  This recipe is still a new favorite way to kick-up a brownie mix.  If you're not a fan of brownie mixes, you could make a double batch of homemade brownie batter and use that instead.

The graham crackers do soften as the brownie batter bakes on top of them.  We liked them soft, except for my oldest daughter.  She still gave these brownies 5 stars, so I don't think it was that big of a deal to her.  She still had s'more!


I share recipes at these linky parties.
reade more... Résuméabuiyad

Patriotic Dessert Pizza

I'm finally back with a new recipe!  So much has happened since our last post.  Our home is now sold and we've moved into a rental house. We've finalized our plans for the new home and hope to start building in the beginning of August.  So exciting!  We also took a trip to Niagara Falls.
These pictures are actually from last summer. It was difficult taking pictures this year and keeping an eye on my littlest one without a stroller!
Isn't it beautiful.  It amazes me how close you can get to the falls.  I kept a close eye on my kiddos while we were there, especially my 2 yr. old!  She was carried or holding a hand the whole time (we forgot the stroller).

Now that we're settled, I'm looking forward to the rest of the summer.  This week we are celebrating the 4th of July.  Of course we need a special treat for Independence Day.  I decided to finally try this recipe for Strawberry Pizza from Your Homebased Mom that I pinned last month.  I'm adding some fresh blueberries to make this a red, white and blue pizza or a Patriotic Dessert Pizza. 

Ingredients (Printable Recipe)
Crust:
1 cup flour
1/4 cup powdered sugar
1/2 cup butter, softened to room temp
Filling:
1 (8oz.) package cream cheese, room temperature
1/2 teaspoon vanilla extract
1/2 cup granulated sugar
1/2 teaspoon freshly squeezed lemon juice
Topping:
1 cup fresh strawberries, mashed
4 Tablespoons granulated sugar
1 Tablespoon cornstarch
8-10 strawberries sliced
about 1/2 cup blueberries
Directions
Crust:
In a medium bowl, combine flour, sugar and butter. Form into a ball with hands and press into a 14-inch ungreased pizza pan OR roll out the crust on a pizza stone . Use flour as needed to keep crust from sticking to rolling pin.
Bake at 325 degrees F. for 15 minutes. Let Cool.
Topping:
In a saucepan over medium heat, combine strawberries, sugar and cornstarch. Simmer until thick and glossy (about 5-10 minutes). Put in refrigerator to cool while making the filling.
Filling:
In a medium bowl, combine cream cheese, vanilla, sugar and lemon juice. 

Spread the cream cheese filling onto the cooled crust. Then, spread the cooled strawberry topping on top of the cream cheese filling. 
Cut fresh strawberries crosswise to make rounds that resemble pepperoni, place on pizza with blueberries.
Enjoy! 
If you have any leftovers, store them in the refrigerator.

Adapted from Your Homebased Mom

Let's get started! Just mix everything together with your hands.
I used my pizza stone.
I rolled out the crust on top of the stone with a little flour. Roll it out as evenly as possible.
I pushed in the edges so they wouldn't be too thin and would bake evenly.
I made the sauce before the filling so it would have more time to cool. My berries were pretty firm, so I used a food processor to mashed them.
Baked and Cooled
First, the cheese mmmmmmmmmmmmmm
Next, the sauce.
Finally, the delicious toppings! Red, White and Blue.
Yum! Happy Independence Day!
The Results...
Delicious without being too sweet.  I've found other recipes for dessert pizzas using sugar cookie dough, but I wanted to try this recipe because it is all from scratch and has less sugar in it.  I'm so glad I did!  This is a 5 star recipe and it's perfect for this time of year while blueberries are in season and you can still get fresh strawberries at a good price.

The crust is buttery and flaky.  The sweetened cream cheese filling adds just enough richness paired with the fresh berries and homemade strawberry sauce.  The star of this dessert is definitely the berries.....fresh, sweet and delicious.

Have a wonderful 4th of July!


I share recipes at these linky parties
and the Weekend Potluck.
reade more... Résuméabuiyad

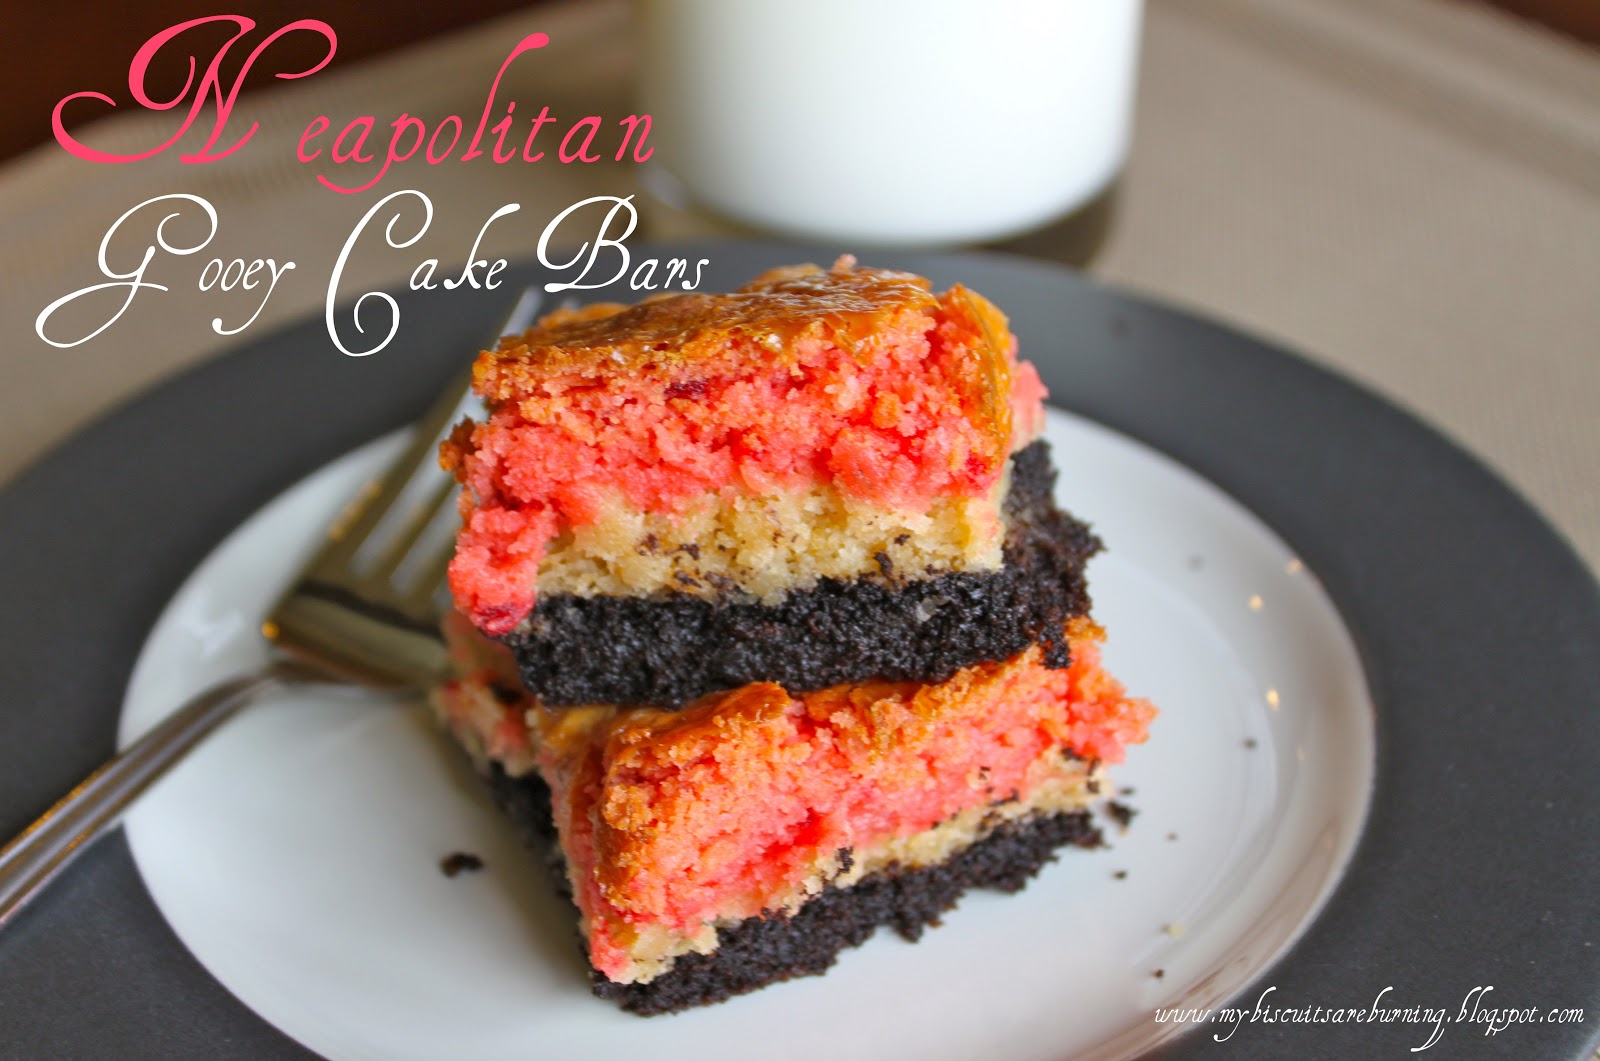
Neapolitan Gooey Cake Bars

I have another sweet bar recipe to share with you, Neapolitan Gooey Cake Bars.  This recipe has THREE cake mixes in it along with THREE sticks of butter and it's topped off with some sweetened condensed milk! OH MY!

Ingredients (printable recipe)
1 box chocolate cake mix
1 box vanilla/white cake mix
1 box strawberry cake mix
3 sticks unsalted butter, softened
3 large eggs
3/4 cup sweetened condensed milk
Directions
1. Preheat oven to 350 degrees F. and line a 9x13 inch baking pan with foil sprayed with cooking spray.
2. Place chocolate cake mix, a stick of butter and an egg into a large bowl, mix until combined. Press into the bottom of prepared baking pan.
3. Place vanilla cake mix, a stick of butter and an egg into a large bowl, mix until combined. Press over chocolate cake layer.
4. Place strawberry cake mix, a stick of butter and an egg into a large bowl, mix until combined. Press over vanilla cake layer.
5. Drizzle 3/4 cup sweetened condensed milk over strawberry layer then bake for 40-50 minutes, until center is cooked through. Let cool completely. Cut off edges, about 1/2 inch, this makes bars look nicer, but not necessary. Cut remaining cake into squares and serve.

Source Picky Palate

Let's get started!
First, the chocolate layer...
Next, vanilla...


Last, the strawberry layer. If you have little helping hands around, let them take some of the cake mixture (which is similar to playdough in texture) and roll it into balls. Then, flatten those balls......
.....and press them into the pan on top of the other cake layers.
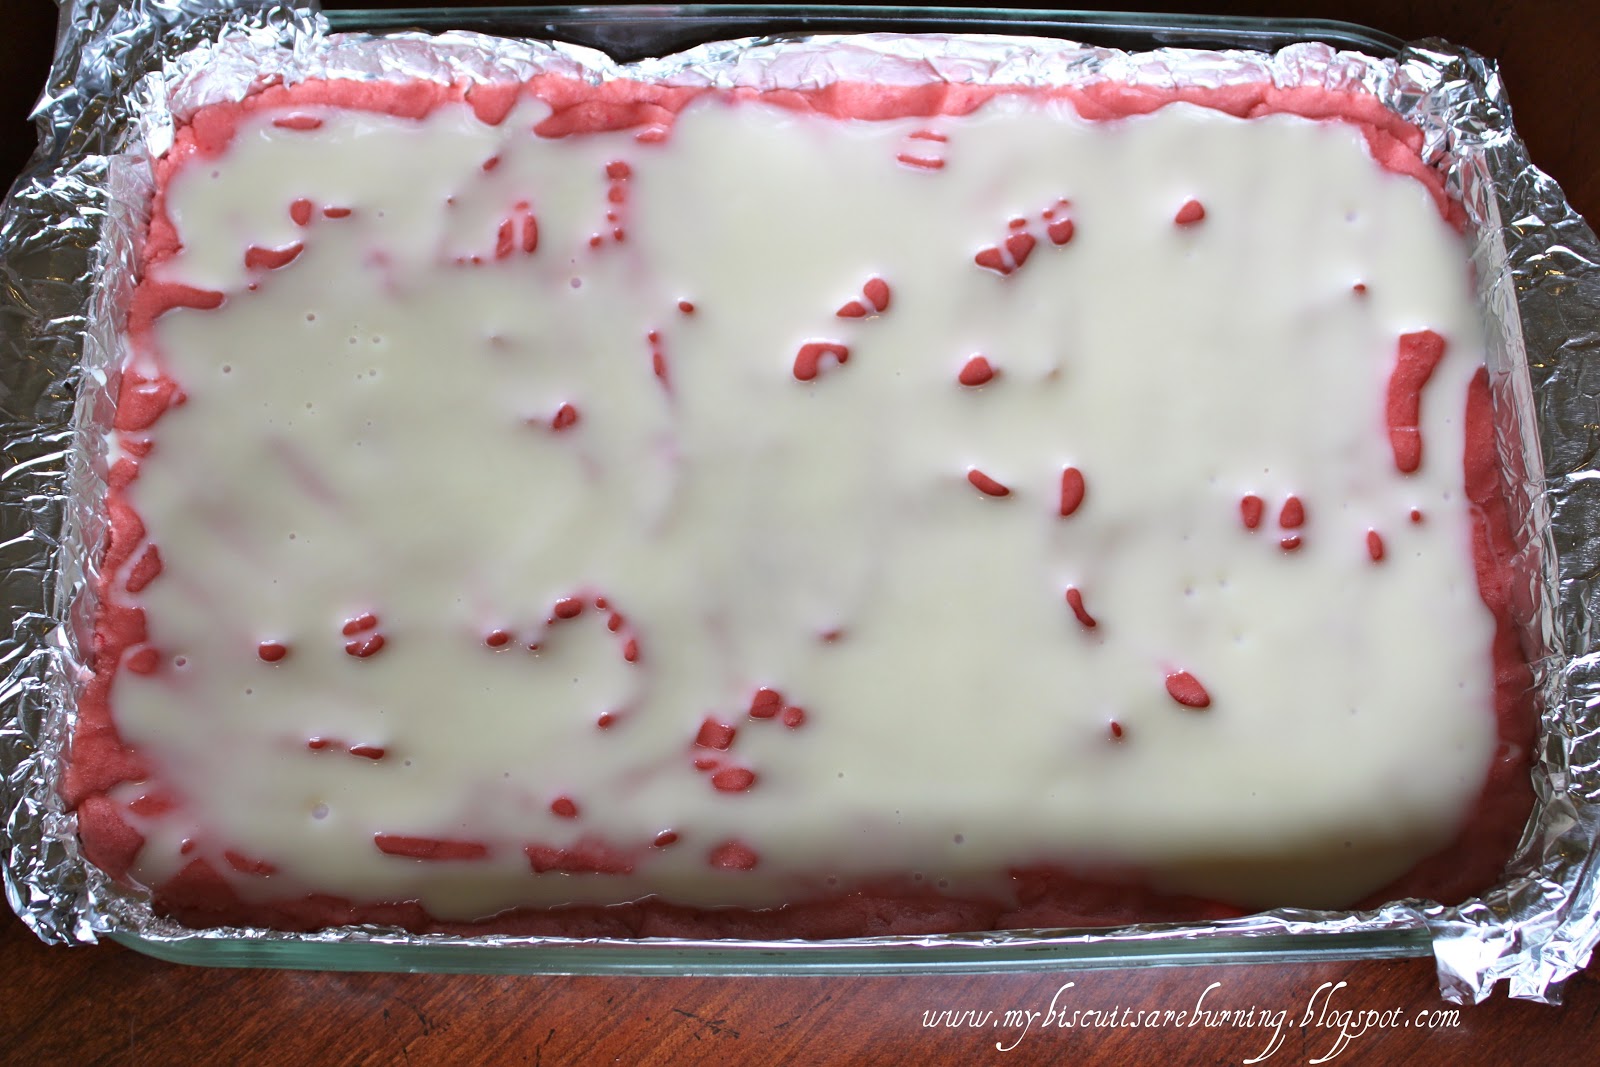
I "drizzled" the sweetened condensed milk on top.
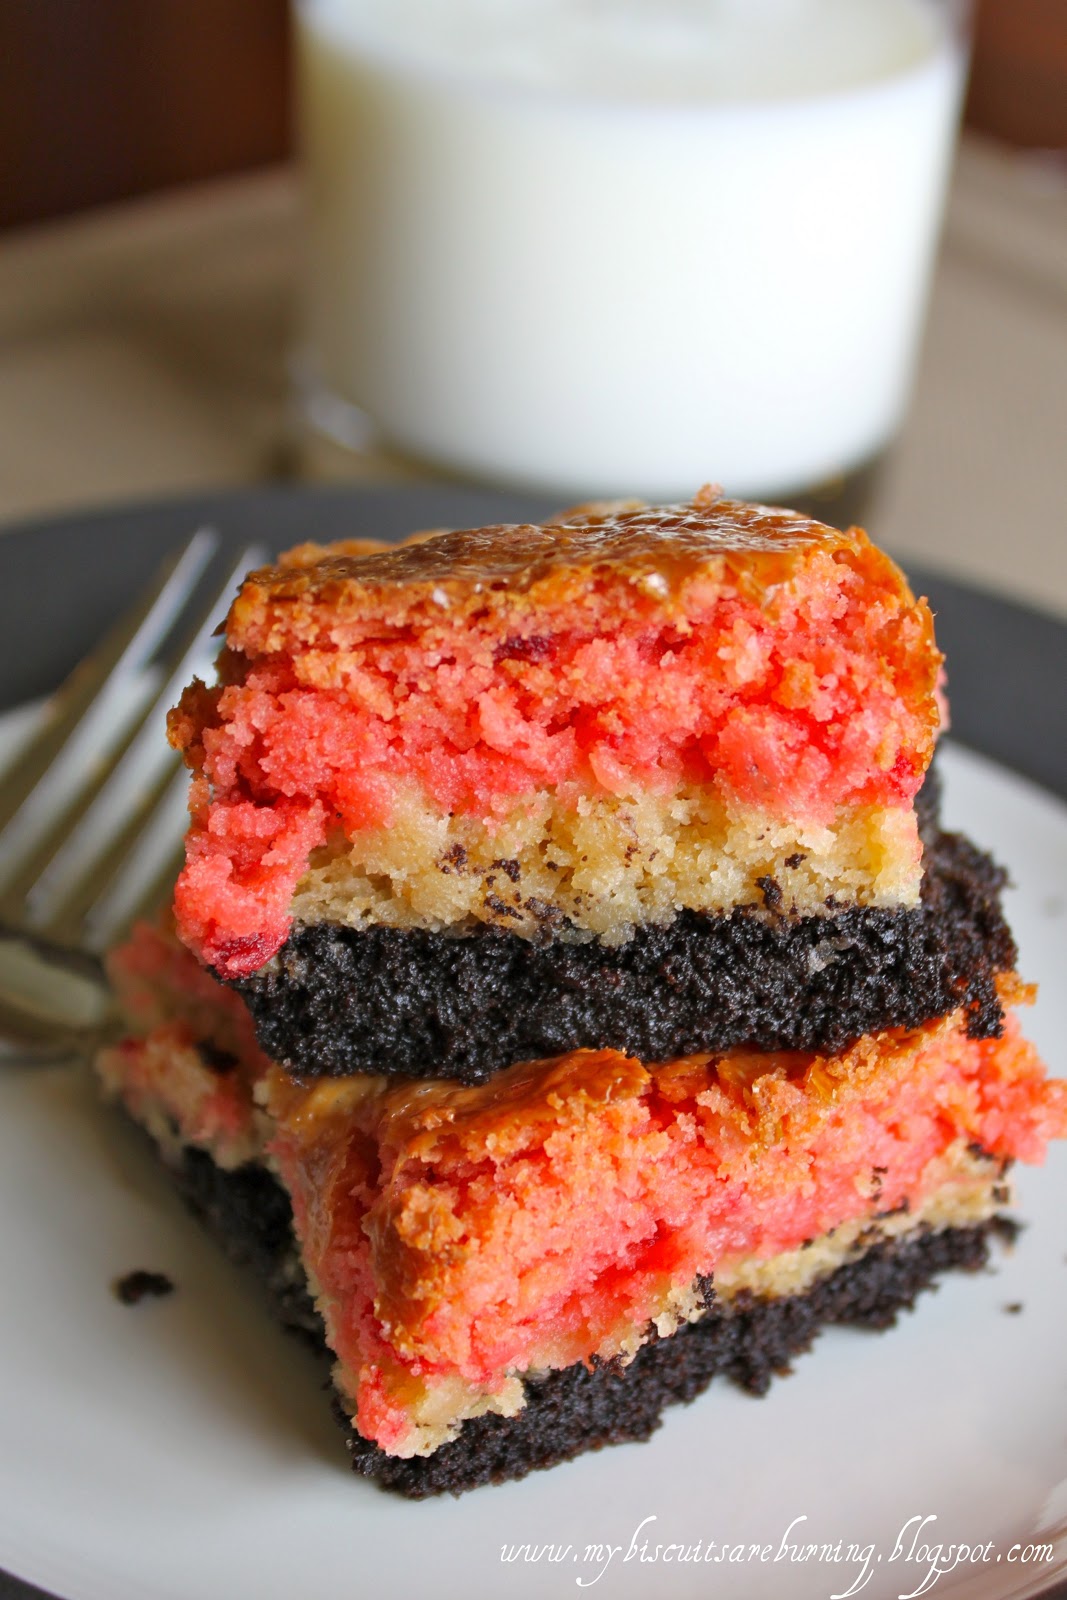
A big glass of milk is a necessity with these rich bars!
The Results...
Dense, chewy, super sweet and rich.  I would cut these bad boys into small squares and drink plenty of milk with them.  I really like the idea of a Neapolitan-type brownie, but we weren't impressed with this recipe.  Honestly, we just thought these were OK.

I also share recipes at these linky parties.
reade more... Résuméabuiyad

Banana Split Bars

What a fun idea to put the flavors of a banana split into a bar!  I found this recipe at Taste and Tell and as I read the ingredient list, I realized I already had everything on hand.  So, I whipped this up for dessert earlier this week.  We love banana splits, so I was curious to see what everyone thought of Banana Split Bars.  

Ingredients (printable recipe)
1/3 cup butter, softened
1 cup sugar
1 egg
1 banana, mashed
1/2 teaspoon vanilla
1 1/4 cup flour
1 teaspoon baking powder
1/4 teaspoon salt
1/3 cup chopped peanuts
2 cups mini marshmallows
1 cup semi-sweet chocolate chips
1/3 cup maraschino cherries, drained and quartered
Directions
1. Preheat oven to 350 degrees F. Grease a 9x13 inch baking pan.
2. In a bowl, beat together the butter and sugar. Add in the egg, banana and vanilla and mix well. Mix together the flour, baking powder and salt, then mix into the batter. Fold in the peanuts.
3. Pour the mixture into the prepared pan. Bake for 20 minutes.
4. Remove from the oven and top with the marshmallows, chocolate chips and cherries. Return to the oven and bake until a toothpick inserted in the center comes out clean, an additional 10-15 minutes. Cool completely then cut into bars.

Source Taste and Tell

The Results...
The bottom is like a banana brownie with chopped peanuts baked inside.  The top is ooey-gooey with melted marshmallows, chocolate chips and cherries on top.

The kids really liked Banana Split Bars and gave them 4 stars.  I thought they were OK and gave them 3 stars.  My husband didn't like these at all, which I thought was funny because he does like banana splits.  I guess you could say it was a "split" decision on these bars. haha!  They still get a spot on the family favorites list because the kids want me to make these again.

Before I "make like a banana.........................and split," I want to ask one favor.  If you make Banana Split Bars, I'd love to know what you think.  Leave a comment and tell me what you decide.  Thank you! 

I share recipes at these linky parties.
reade more... Résuméabuiyad

Chewy Butterscotch Brownies

Sundays are my favorite days for making something sweet.  Everyone is usually home, which means I will have help eating all those sweets. :)  It's Sunday and today I made Chewy Butterscotch Brownies. 

Ingredients (printable recipe)
2 1/2 cups all-purpose flour
1 teaspoon baking powder
1/2 teaspoon salt
1 cup (2 sticks) butter, softened
1 3/4 cups packed brown sugar
1 tablespoon vanilla extract
2 large eggs
1 2/3 cups (11 oz. pkg.) Butterscotch morsels, divided
1 cup chopped nuts (optional)
Directions
Preheat oven to 350 degrees F. Combine flour, baking powder and salt in a medium bowl. Beat butter, sugar and vanilla extract in a large mixing bowl until creamy. Beat in eggs. Gradually beat in flour mixture. Stir in 1 cup butterscotch morsels and nuts. Spread into ungreased 9x13 inch baking pan. Sprinkle with remaining butterscotch morsels. Bake for 35-40 minutes or until wooden pick inserted in center comes out clean. Cool in pan on wire rack.
  
Source Very Best Baking

YUM!
Extreme Close-up
The Results...
It amazes me how quickly sweets get gobbled up around here.  Everyone really liked Chewy Butterscotch Brownies.  I thought these would be yummy with ice cream.  I was planning on making Butterscotch Brownie Sundaes with vanilla ice cream, caramel sauce and toasted nuts on top.  But, these quickly disappeared before I had a chance!


I share recipes at these linky parties.
reade more... Résuméabuiyad